Uploading and using images

Your images and gallery
To wed lets you import images to use on your web pages, your RSVPs & events, and also as an image gallery.
Start by going to Images on the menu bar, or the Upload Images button on the Dashboard.
Upload images
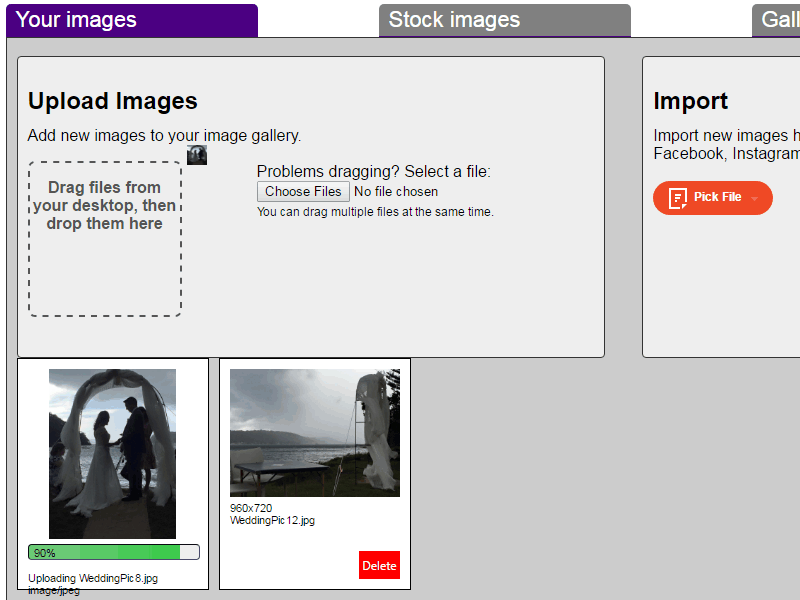
 If you are using a PC, you can just drag images from a file or your desktop right into the Upload Images box, and they will load automatically. You can see a thumbnail as it is loading, and green bar shows the upload progress.
On an older PC or an ipad/tablet/phone you need to click the Choose Files button, and select the image you want to upload.
Large images will be slightly compressed to help them render faster on a slow connection, but small images (less than 1024x768) will upload uncompressed.
Please ensure you own the copyright of images you upload.
Upload images from social media
 You can upload images hosted elsewhere, such as on Facebook, Instagram, or Pinterest.
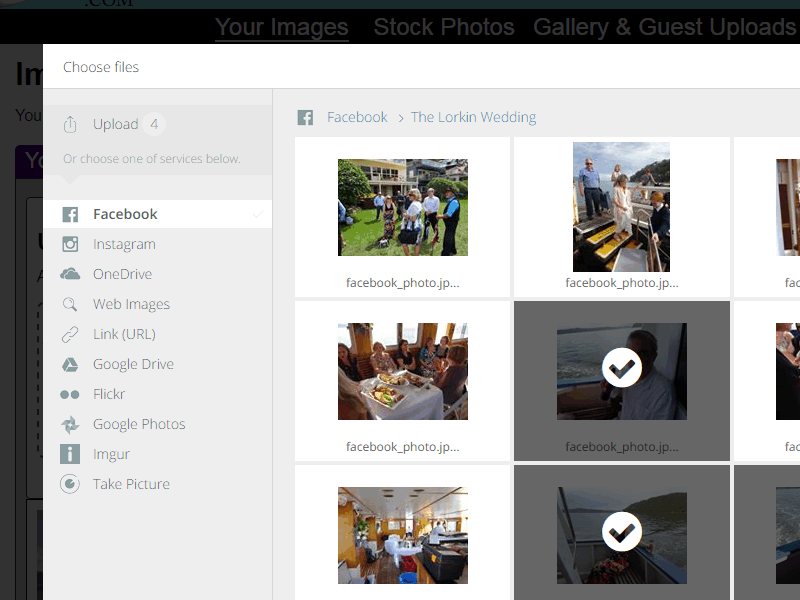
On Images > Your Images under the Import section, click Pick File. A new window opens, with various Social Media on the left. Click on the one you want, and then if you aren't logged in you will be asked to log into Facebook etc.
Then, click on the directory you want, and the file. It appears with a tick, and then click Select file.
Using stock images
 To-wed has a vast library of stock images you can use on your web pages.
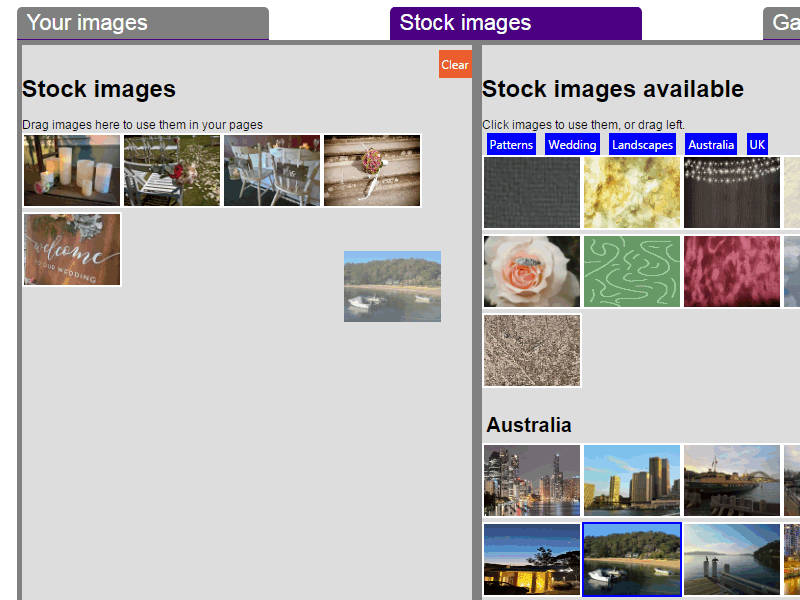
Go to Images > Stock Photos in the menu bars, and all the stock images available appear on the right hand side of the screen.
Drag to the left, or click on the images, to use them in your web pages. As you select images, all the changes are auto saved - you don't need to save them.
The blue buttons scroll down to the sections with images of Weddings, Landscapes, etc.
Your image gallery
 You can have a webpage on your website, with a gallery of your favourite images.
Go to Images > Gallery in the menu bars, and you will see your Wedding Moments Gallery.
This appears as a timeline stripe over the middle of the screen, with small thumbnails below.
To insert your images in the gallery, just tick the box (or click on the image) and it will appear in your gallery. To remove it, untick the box, or click on the red cross by the image in the gallery. To move images earlier or later in the gallery, click on the two arrows. If you want to upload all of your images, just tick the 'All' box.
Remember to save the gallery when you are happy with it.
Initially, your gallery is invisible and does not appear as a web page. Slide the toggle (or click the box on an ipad/phone) for Page Visible to turn the gallery on, and it will then appear in your menu bar.
You can also update this after your wedding, which is a great way to show your wedding photos to all your guests!
Guest uploads of images
 A great feature of to-wed is that your wedding guests can upload images to your site, and you can add them to your gallery.
When guests RSVP they see a button 'Upload Images' on the RSVP section, and also on their RSVP reply page. If guests click to upload, they can drag in images, or select a file (on older PCs and ipads/phones).
These images do not automatically appear in your gallery - instead you have to approve and select them. It is just the same procedure as with your image gallery - tick the box (or click on the image) by each image to approve it, and it appears in your gallery.
If you don't want to let guests upload images, you can turn off the feature, under Settings > RSVP settings, and then untick the box 'Allow guests to upload images to your gallery'.
It really is that easy - if you have any more questions just get in contact!
